Now that we understand the JSON-feed mechanism, it is quite easy to convert all our feeds to customizable widgets, that you can copy to your own sidebar. You can use the widget to display your own recent posts on your own blog, but you can in fact display the post-feeds of any Blogger blog you like.
Installation is easy.
Install Widget
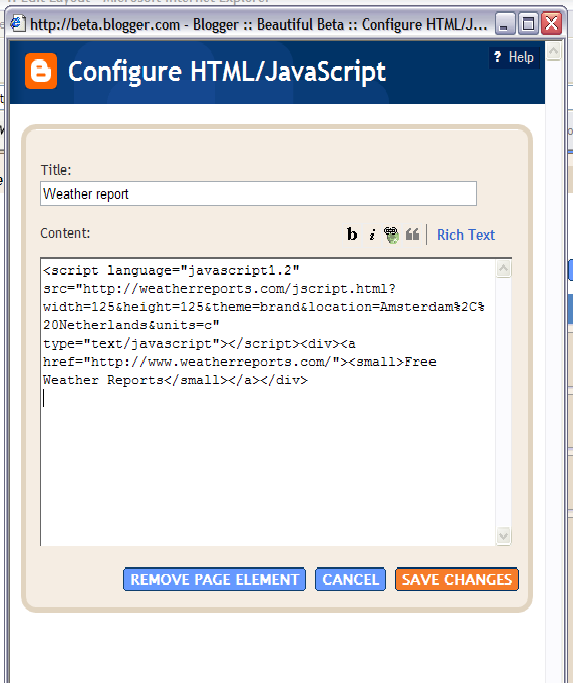
Go to the Widgets & Downloads Page and click the Install Recent Posts button.
This will bring up a pop-up window in which you can customize the widget settings, before adding it to your blog.
Replace 'beautifulbeta' with the name of your own blog.
Set the number of recent posts you want to show (default = 5).
If you want the post date to be displayed, check the box (default = checked).
If you want a post summary to be displayed, check the other box (default = checked), and enter the number of characters of the postsummary that you want to display (default = 100).
If you want the standard styling, select the 'standard' radio-button. If you want to define your own CSS-definitions, select 'custom css'. After installing the widget you will have to add CSS-definitions to your blog's template for the classes .bbrecpost, .bbrecpostsum and .bbwidgetfooter.
Now click the 'Customize' button, or click 'Reset' to return to the default values. If you are satisfied with the settings, click 'Add Widget To My Blog'. This will bring up the Blogger-screen that lets you select your Blog to install the widget to. Click the blue 'Add' button to add the widget to your blog.
Update 1: the widget did not work for Short feeds. That is fixed now, it will work for both Full and Short feeds.
Update 2: it is not longer needed to add the javascript library to your template. The widget now realy is plug and play.
Update 3: you can install the widget using Beautiful Beta's Widget Installer. Click-n-Go, no hacking or editing needed!
If your Blog is published to your own FTP-site, click here for the FTP-version of this widget.
Widgetizing your Blog is the new thing to explore here on Beautiful Beta. Ramani shows how to add random Einstein quotes to your Blog. Phydeaux3 started all this showing Flickr Puppies, and even Hoctro now shows a Flickr Zeitgeist widget. So it is time that Beautiful Beta follows these fellows, with a useful Weather Forecast Widget. And ofcourse a tutorial on how to create this widget on your own Blog and make it easy-to-install for your readers.
You have to follow 3 easy steps:
Step 1: Create the Widget
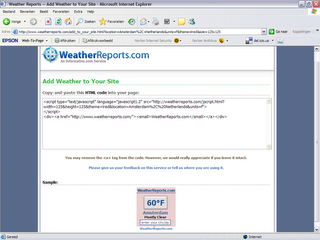
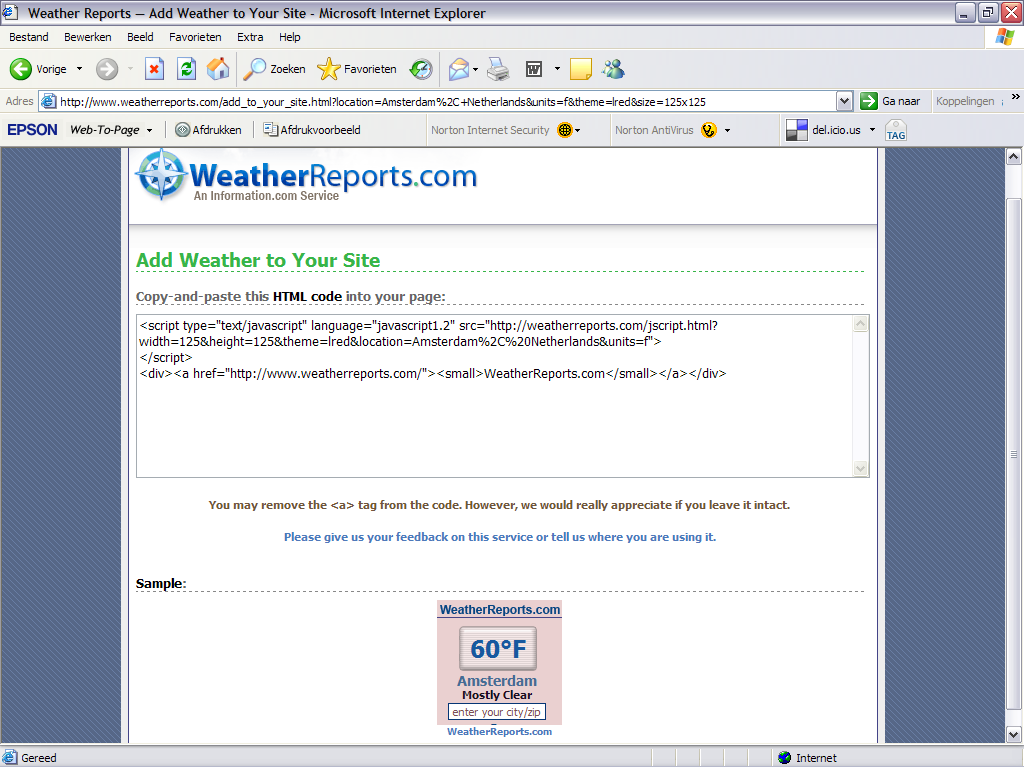
Go to WeatherReports.com, scroll down and click Add WeatherReports To Your Site.
In the next screen, enter your city, select the colors and style of the weatherbox. After entering all your selections, you will go to the next screen automatically. Take a look at the preview, and select and copy the HTML-code.
Step 2: Add the Widget to your Blog
Add an new HTML page element to the sidebar of your Blog. Paste the code that you copied into the page element, and set its title to "Weather Report".
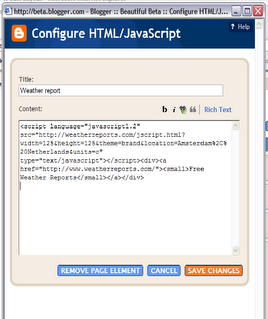
Don't save it yet, but go to step 3.
Step 3: Add an Install-button
Now we are going to add a button, that installs the widget on your visitors blog when it is clicked. In fact, we'll add a form with several input fields, but only the button will be visible. Here we go.
The text between the
Today I tried to create a Blog at my own internet-provider, using the new Blogger FTP publishing facility. I was a little afraid to do so, because of all the difficult questions I had to answer, such as the host path, filenames, etcetera. But to my great astonishment I set it up in less than 30 seconds!
So, that is good news if you want to publish a weblog at your own domain, or if you want to integrate weblog and classic webpages at one place on the web.